A Stunning No-Bake Cheesecake Flag Cake for Summer Celebrations
A gorgeous patriotic sweet treat that brings together the luxurious, creamy texture of cheesecake with vibrant fresh berries, all styled in a classic stars and stripes design. This effortless, no-bake dessert is the ultimate choice for warm summer festivities when turning on the oven is the last thing you want to do!
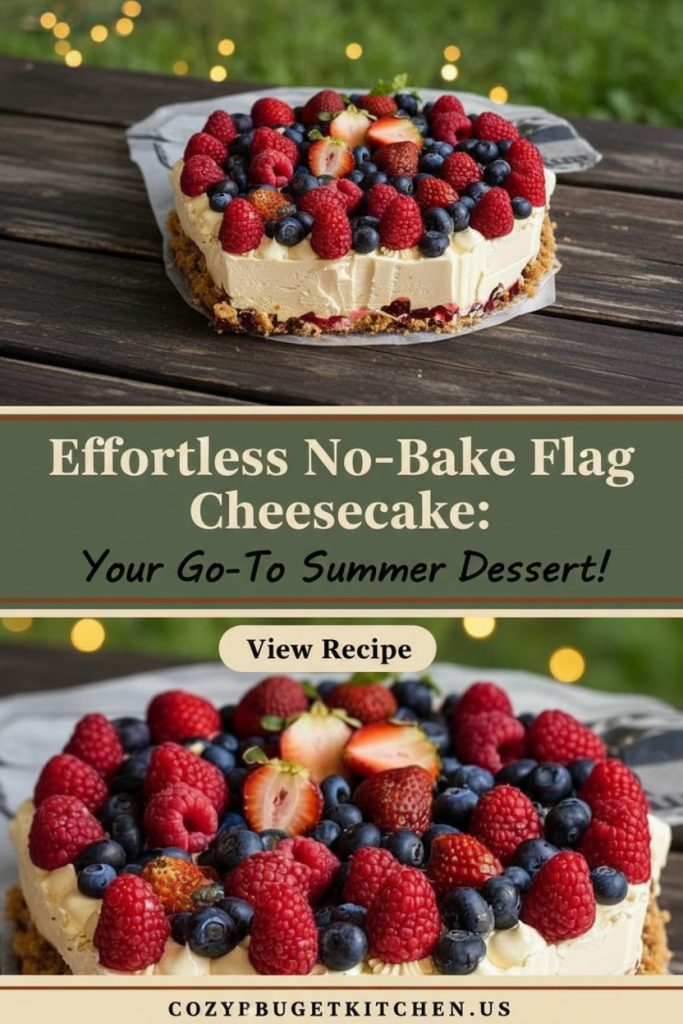
Why You’ll Fall in Love with This Recipe
This beautiful no-bake cheesecake flag cake is a true showstopper that impresses with both its looks and its taste. The airy, mousse-like consistency serves as the ultimate base for a colorful fresh fruit topping. It’s a brilliant dessert choice for the Fourth of July, Memorial Day, or any occasion calling for a bit of patriotic flair. Because it requires absolutely zero baking, it’s a lifesaver on sweltering summer afternoons when you want to keep your kitchen cool. The delightful blend of zesty cream cheese, decadent mascarpone, and juicy berries results in a perfectly balanced treat that feels incredibly special without being overly sugary.
Everything You Need (Ingredients)
(Note: You can find the exact measurements and a quick-reference list in the recipe card at the bottom of this post!)
- Graham cracker crumbs create the base of our slightly chocolatey crust, offering that traditional cheesecake foundation with a wonderful crumbly bite. You can grab a box of pre-crushed crumbs or easily make your own by blitzing whole crackers in a food processor.
- White sugar is used in both the crust and the creamy center, providing just enough sweetness to offset the tangy cheeses. It also plays a key role in stabilizing the whipped cream.
- Unsweetened cocoa powder lends the crust a gentle chocolate note that pairs flawlessly with the fresh fruit. Plus, it gives a gorgeous dark color contrast against the snowy white filling.
- Butter is the glue that holds our crust together and ensures it sets up perfectly in the fridge. Be sure it is completely melted so it mixes easily with the dry ingredients.
- Cream cheese delivers that iconic, tangy flavor we all crave in a cheesecake. Letting it soften to room temperature is absolutely essential for a silky, lump-free batter.
- Mascarpone cheese brings a luxurious extra layer of creaminess to the table. This mild Italian cream cheese is the secret to achieving that dreamy, mousse-like consistency.
- Lemon zest and juice add a bright, subtle citrus pop that cuts through the heavy cheeses and highlights the fresh berries.
- Vanilla extract contributes a cozy depth of flavor, elevating the entire dessert without overpowering the other delicate notes.
- Heavy whipping cream gets whipped into soft peaks and gently folded into the cheese blend, creating the signature light and fluffy texture that makes this no-bake version so incredible.
- Strawberries and blueberries aren’t just for building the beautiful flag pattern; they also provide a burst of fresh, juicy sweetness that perfectly balances the rich filling. Their bright colors make this cake a true feast for the eyes.
How to Make It Step-by-Step
- In a mixing bowl, toss together the graham cracker crumbs, ¼ cup of sugar, cocoa powder, and melted butter until everything is evenly moistened and looks like coarse sand.
- Pour the crumb mixture into a 9×11-inch baking dish. Firmly press it down into an even layer across the bottom. Cover the dish tightly with plastic wrap and pop it into the fridge for about 30 minutes to set.
- In a large bowl, blend the cream cheese and mascarpone together until completely smooth. Stir in the lemon zest, lemon juice, and vanilla extract until well incorporated.
- Grab a separate glass or metal bowl and whisk the heavy cream with ⅓ cup of sugar until it becomes fluffy and holds soft peaks. Gently fold this whipped cream into your cheese mixture until the filling is airy, soft, and unified.
- Dollop the filling over your chilled graham cracker crust, using a spatula to smooth it out evenly. Give the pan a few gentle taps on the counter to settle the filling and remove any air pockets. Cover tightly with plastic wrap and chill in the refrigerator for at least 3 hours to set.
- To decorate, start at the bottom long edge of the cake. Place strawberry halves in a straight horizontal line, with the pointed ends facing right. Create a second stripe of strawberries at the top right, stretching about ⅔ of the way across the cake.
- Keep building your strawberry stripes, leaving about ¾ of an inch of white space between them. Add 3 more full-length stripes. Finally, add one more short stripe just below the top one, leaving an empty square space in the upper left corner for your “stars.”
- Fill that upper left square with fresh blueberries, placing them with the blossom ends pointing up. Pack them closely together until the square is completely filled. Slice into squares and enjoy!
Yield and Time Breakdown
This recipe makes one 9×11-inch cake, which comfortably serves 12 people. Hands-on prep time is only about 30 minutes, but don’t forget to factor in the chilling time! You’ll need 30 minutes to set the crust and a minimum of 3 hours for the filling to firm up. The total time from start to finish is roughly 3 hours and 30 minutes, making this a brilliant make-ahead option for your next party.
Fun Variations to Try
- Berry Swap: You don’t have to stick to strawberries and blueberries! Raspberries look stunning for the red stripes, and blackberries make a great substitute for the “stars” if you’re out of blueberries.
- Chocolate Lover’s Version: Fold a handful of mini chocolate chips into the creamy filling for a fun, chocolate-speckled twist that kids go crazy for.
- Citrus Twist: Bump up the lemon zest, or swap it out entirely for orange or lime zest to give the cake a bolder citrus punch.
- Vanilla Bean Upgrade: Trade the vanilla extract for the scraped seeds of one whole vanilla bean. It gives a richer flavor and leaves beautiful little dark specks throughout the white filling.
- Gluten-Free Option: Simply swap the standard graham crackers for a gluten-free brand to make this dessert safe for those with gluten sensitivities.
- Coconut Crust: Trade half of the graham cracker crumbs for toasted shredded coconut to give the base a fun, tropical vibe.
- Flavor Infusions: Stir a tablespoon of your favorite liqueur (like Amaretto or Grand Marnier) into the filling for a sophisticated, adult-friendly twist.
Storing and Freezing Instructions
You can keep this no-bake cheesecake in the fridge, tightly covered with plastic wrap, for up to 3 days. For the prettiest presentation, I highly recommend waiting to add the fresh fruit until 24 hours (or less) before serving, as the berries will eventually start to bleed their juices into the white filling.
Want to freeze it? You can absolutely freeze the cake without the fruit on top! Let it set completely in the fridge first, then wrap the whole pan tightly in plastic wrap, followed by a layer of aluminum foil. It will keep in the freezer for up to 1 month. When you’re ready to eat it, let it thaw in the fridge overnight, then decorate with fresh berries right before serving.
Note: This dessert is designed to be eaten cold. Do not attempt to reheat it, or the delicate creamy filling will melt and lose its shape!
Frequently Asked Questions
Why did my filling turn out runny?
The most frequent issue is either not whipping the heavy cream enough, or mixing too aggressively once the cream is added to the cheese. Ensure your cream reaches soft peaks before adding it, and use a very gentle folding motion to keep those precious air bubbles intact.
Can I make this dessert a day ahead?
Yes, absolutely! This dessert actually loves an overnight stay in the fridge. You can assemble the whole thing—fruit included—up to 24 hours in advance. If you need to make it even earlier, just hold off on adding the berries until right before your guests arrive so they look their freshest.
What’s the difference between no-bake cheesecake and regular cheesecake?
A classic cheesecake uses eggs and requires baking in an oven (usually in a water bath to prevent cracking). A no-bake cheesecake relies on whipped heavy cream to stabilize and set the filling without any heat or eggs, giving it a much lighter, fluffier, mousse-like bite.
Can I use low-fat cream cheese or whipping cream?
You can get away with using low-fat cream cheese (though it changes the texture a tiny bit), but you must use full-fat heavy whipping cream. Lighter creams or half-and-half simply will not whip up thick enough to give the cake its structure.
My crust is crumbly and doesn’t hold together. What went wrong?
It sounds like your crust needed a little more butter to act as glue. Next time, try adding one extra tablespoon of melted butter. Also, ensure you are pressing the crumbs down very firmly into the pan—using the flat bottom of a glass or measuring cup works wonders!
Can I use frozen berries for the decoration?
I highly recommend sticking to fresh berries. As frozen berries thaw, they release a lot of liquid, which will bleed into your beautiful white cheesecake and make the top soggy. If you can’t find fresh berries, you might want to try a different style of decoration.
How do I get clean slices when cutting the cheesecake?
The secret to bakery-perfect slices is a hot knife! Run a sharp knife under hot water, wipe it completely dry with a towel, and make your slice. Repeat the hot water and wiping process between every single cut. This stops the knife from dragging the filling and creating a mess.
Can I use a different sized pan?
You can, but you will need to do some math to adjust the ingredients. A smaller dish means you’ll need less filling (or you’ll end up with a very tall cake), while a larger dish requires more ingredients so the cake doesn’t end up too thin.
Is mascarpone cheese necessary or can I substitute something else?
Mascarpone is what gives this recipe its incredibly unique, velvety texture. However, if you can’t find it, you can substitute it with an equal amount of regular cream cheese. The final result will be a bit tangier and slightly denser, but still absolutely delicious!
Why does my cheesecake have cracks or bubbles on the surface?
Baked cheesecakes crack from heat, but no-bake cheesecakes can get little craters from trapped air bubbles. To fix this, simply give your pan a few firm taps on the kitchen counter right after you spread the filling. This forces the air bubbles up and out before the cake sets.
👩🍳 Sarah’s Kitchen: No-Bake Cheesecake Flag Cake
Crust Ingredients:
Filling & Topping Ingredients:
Final Thoughts
This No-Bake Cheesecake Flag Cake is the perfect marriage of easy preparation and jaw-dropping presentation, making it the ultimate star of your patriotic holiday spread. The beautiful contrast of the tangy, velvety filling, the rich chocolate-kissed crust, and the bright, juicy berries results in a dessert that tastes just as amazing as it looks. The best part? Since you don’t need an oven, it’s a foolproof, make-ahead lifesaver for those scorching summer days when you want to keep the house cool. Whether it’s for the Fourth of July, Memorial Day, or just a fun summer BBQ, this treat is guaranteed to pull in the compliments and satisfy everyone’s sweet tooth!
Sarah’s Budget Tips
- Buy Berries in Season: Strawberries and blueberries are usually heavily discounted right around the 4th of July. Buy them when they are on sale to save a few dollars!
- DIY Graham Crumbs: Pre-crushed graham cracker crumbs are convenient, but buying a standard box of whole graham crackers and crushing them yourself is almost always cheaper.
- Store-Brand Dairy: Don’t feel pressured to buy name-brand cream cheese or heavy cream. Store brands work exactly the same in this recipe and will save you a solid chunk of change.